INSTALLATION INSTRUCTIONS
Part 1 – General
1.01 Summary
A. This section includes detectable warning tiles.
1.02 Reference Standards
A. American Disabilities Act (Title 49 CFR Transportation, Part 37.9 Standards For Accessible Transportation Facilities, Appendix A, Section 4.29.25 Detectable Warnings On Walking Surfaces.
1.03 Submittals
A. Product Data: Submit manufacturer’s literature describing products, detailing installation and maintenance procedures.
B. Shop drawings shall be required for each product detailing dimensions for each product and tile surface profile.
C. Samples: 3 samples of each product to be used will be submitted for approval in advance of any placement.
1.04 Quality Assurance
A. Detectable Warning Tiles will be sourced from a single manufacturer.
B. Detectable Warning Tiles must conform to all current ADA Specifications.
C. Detectable Warning Tiles shall conform to the following*:
| Replaceable Polymer Detectiles | ||||||||||
|
|
Integral color throughout
*for Duratek polymer tiles
D. Detectable Warning Tiles shall be warranted in writing for a period of five years from the date of sale.
1.05 Delivery, Storage and Handling
A. Detectable Warning Tiles shall be packaged in a manner to Prevent damage during shipping.
B. Detectable Warning Tiles shall be stored in an area where they will be protected from damage.
1.06 Extra Stock
A. Deliver extra stock to owner. This extra stock shall be of the same type and manufacturer as that which has been installed. Furnish not less than two or 10% of the supplied materials for each type and color installed.
Part 2 – Products
2.01 Panel Manufacturer
A. Manufacturer: Subject to compliance with requirements, Manufacturers offering compliant tiles include, but are not limited to the following:
Detectile
P.O. Box 3517
Oak Brook, IL 60523
(312) 213-1507
2.02 Installation Materials
A. Replaceable anchors will be provided with tiles.
Part 3 Execution
3.01 Installation
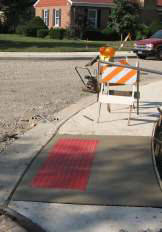
A. Isolate work area by using barricades or cones to block off the work area from pedestrian or vehicular traffic. Consult with local governmental agency or other standard to be certain safety guidelines are followed.
B. Before pouring concrete determine the layout of tiles.
C. Pour and finish concrete according to the drawings and specifications. Check the slope of the concrete with an electronic level to assure compliance.
D. Our replaceable Detectiles use a replaceable threaded anchor system. When using the replaceable concrete anchor system firmly attach concrete anchoring system securely to Detectile before placement.
E. Trace the approximate location of the tiles and remove the approprite thickness of concrete.
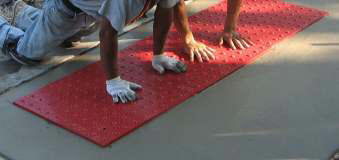
F. Place the tile in the void created by applying downward pressure and twisting the tile to set. The tile should be level with the surrounding concrete. Place the remaining tiles flush to the previous using the same downward twisting method.
G. Float surface of concrete surrounding tiles making sure that any concrete displaced by the tiles is removed and the surface is finished in a manner that the tile becomes an integral part of the sidewalk and does not disturb the uniform slope achieved before placement.
H. Recheck slope to confirm that the installation of the tiles has not disturbed the slope.
I. Carefully finish the edges, and clean of any concrete that has spilled during the installation
J. Protect area from pedestrian and vehicular traffic until the concrete has cured sufficiently.
Clean by spraying with water
Do not spray or allow setting compounds or other chemicals to interact with Detectiles, use protective barriers to protect Detectiles if such chemicals/compounds are used on surrounding areas.


